
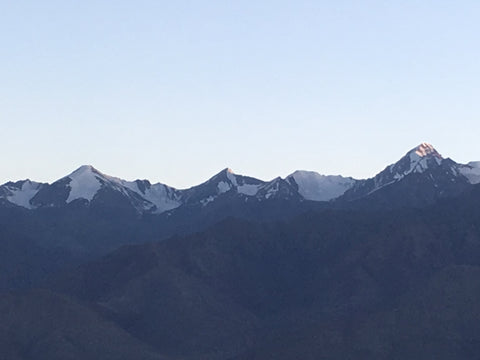
Trekking at an altitude of 6,000 is a rare possibility that only a few mountains allow. One of them lies in the Ladakh range of the Indian Himalayas - Stok Kangri that rises to an altitude of 6,123 metres. Deriving its name from the village where it stands – Stok, situated 15km south of Leh, Stok Kangri has been identified as a trekking peak by the IMF, simply meaning that no technical knowledge of mountaineering is required for climbing this peak. The challenge is to avoid any sickness due to high altitude and walk for fifteen hours at a stretch on the night of summit attempt, at times at steep inclinations while other times over glaciers or rocky boulders.
The ideal time for attempting Stok Kangri is mid-June to mid-September although weather conditions at this altitude can alter this window and heavy snowfall or snowstorms can reduce visibility to nil, hindering your summit attempt. Below is an account of my summit experience during the first week of September 2017.
Day 1: Arrived in Leh (3,500m) by flight from Delhi and took complete rest. I parked myself at Ecological Hostel near Shanti Stupa which according to my research is the cheapest lodging at INR 280 per night in the Leh city. Also it runs completely on solar with a 1.86 MW setup and only has compost toilets. The aunty at the hostel prepares home-made food and don’t worry, the hostel has wi-fi.
Day 2: Exerting yourself to some extent can help with better and faster acclimatization, so I did a 3-4 hour afternoon trek around the Gyamcha valley and then went for an evening stroll to the Shanti Stupa. The sunset view of the Leh palace and the city from the Stupa is worth the wait there. You also get a nice view of your aim – the Stok Kangri, standing high towards the south west direction.
Day 3: Hiked to the Tsemo monastery, also the highest point in the Leh city for another breath-taking view of the city. I then enquired about the Stok Kangri trek from various agencies to find the cheapest deal and I figured the best way to go about it is to start walking on the well laid out trail till the Base Camp alone and find a guide there itself. More on hiring a guide later
Permissions: Do make sure to collect your permission from the IMF office located at the beginning of the Chanspa road in Leh city to avoid paying penalty later. Do mind their timings as the office is shut between 1pm and 5pm. It’s free for Indians whereas foreigners are charged INR 3,000.
Day 4: Started early today to give enough time for acclimatization at the first camp. The trek starts from the Trekking Point in the Stok village. Cheapest way to reach Stok is taking a shared cab to Choklamsar from the Leh taxi stand and then hiring a private cab to reach the Trekking Point. This will cost INR 10 + INR 300. You’ll be lucky if you find a shared cab to Stok as the frequency is not so often. I decided to hitch-hike from Choklamsar and got lucky to reach my destination without wasting a lot of time.
Walked for 2 hours along the right side of the river to reach “Chang Ma” (4,000 m) and halted for tea/lunch. You can also stay here for the night if your body gives any symptoms of altitude sickness. Although it’s better to spend more time acclimatizing at higher camps.
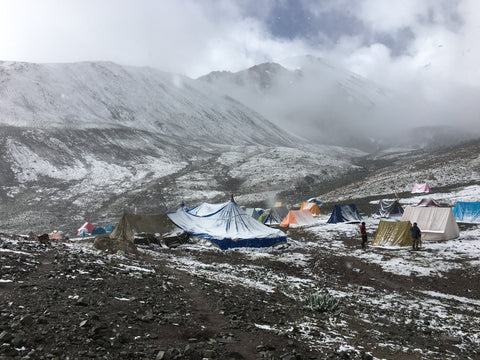
Walked for another 1.5 hours while following the stone trail to finally reach “Mankarmo”(4,200m) and stayed there for the night. There is decent homestay facility available at these camps which are managed by a student run organization called “Mitra”. It’s easy to spot their flags and they have the biggest setup amidst the camp area. They provide tents, sleeping bags and three meals for INR 1,500 per night. You can save INR 500 if you decide to carry your own tent and sleeping bag. Spent the remaining day taking adequate rest, acclimatizing and chatting with fellow hikers
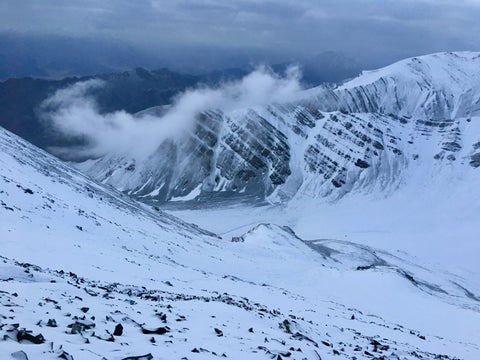
Day 5: Walked for 2 hours to reach the Base Camp (4,900m) and found accommodation in a similar Mitra setup at the same cost. Completed a thirty minute acclimatization climb to a small hill on the way to the summit and returned to take adequate rest before the night long attempt. The previous week had seen heavy snowfall because of which the trek from base camp to summit was entirely covered with snow and at least half of the distance was covered under knee deep snow.
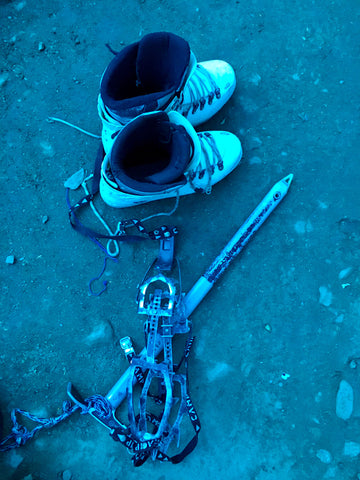
I rented snow-boots, ice axe and crampons from the base camp for INR 250 each. I requested a guide to help me understand their purpose and usage since it was my first time with such equipments. The Scarpa snow boots, although very technical, are a big pain to walk in and I’ll always try and avoid them in the future. I met a small group at the base camp that was trekking without a guide as they had someone experienced amongst them so even I decided to follow them and not hire a guide.
Night 5: On the night I was supposed to start walking, it was snowing heavily and visibility was nil after thirty minutes into the trek. Except a few people, most groups decided to call it off and I did the same. It didn’t seem practical at all to make the attempt without a guide.
Day 6: The weather had provided window on only one of the nights in the last one week and counting my odds, I decided to call the whole thing off. I cleared my bill and started walking down when I met some people on the way who convinced me to give it another shot. I will always be grateful to these people!
By now the statistics for the last night were clear and had become the talk of the base camp! Out of those who started, only three Indians and four Germans (excluding guides) had made it to the summit. They called it the most challenging thing they’d ever done because of the snow storm that they had to face at the top. Some of them had to walk without water for long because the storm had frozen the water in their plastic bottles!
Although the weather was better than the previous day, it had still been snowing across the evening. I got my bag ready with all that was required (Snickers, packed lunch and two litres of water – next time I would carry some apples) just in case the weather decided to show mercy and slept after dinner at 6PM to wake up later.
Night 6: The people who had convinced me to return had been pro-mountaineers and were confident that we didn’t require a guide and that they would lead the trail for me to follow, so I decided against hiring a guide, yet again. Later in the night, at 10PM, one of them got sick and called off their attempt. At 10.10PM, there was some snowfall but the visibility wasn’t so bad. An Indian group had left half an hour back and a lady had left with her guide a while back and I could see their torch-lights on the hill. I decide to follow them.
The final route spreads out approximately as follows:
- 30 minute uphill climb along the acclimatization hill followed by
- 1 hr walk on almost level ground with steep slopes on the right followed by
- 1 hr walk through boulders, there is a stone trail to help you correct your way
- 1 hr walk through the glacier which was covered in knee deep snow. This is where we put our crampons which took about 20 mins as we struggled to find ground to stand in the soft snow. By this time, I had caught up with the first group and some foreigners had joined us. Luckily the weather had cleared up by this time and under the almost full moon, I saw some people walking without their head torch on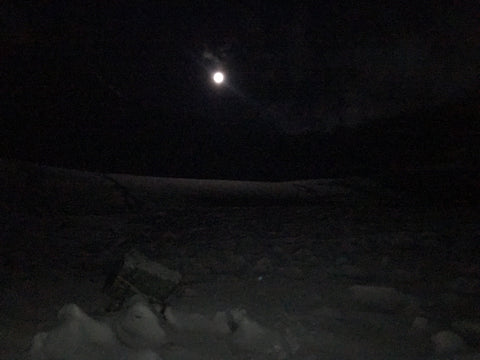
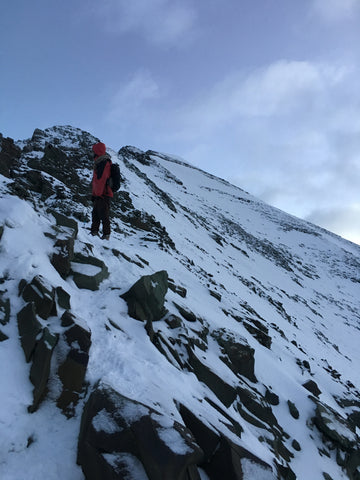
- 3 hr steep uphill climb in knee deep snow to reach the shoulder. This was the most challenging part as the stretch didn’t seem to end and I noticed a lot of people giving up. This is also where you gain most of the height and I saw some people returning due to altitude sickness. They were mostly foreigners who had reached the shoulder too quickly!
- 2 hr walk on the ridge from the shoulder to the summit in a snake-like route while being careful of the steep slopes on either side. Crampons make it easier to get your grip on the occasional stones and the thick soft snow but it might take a while to get used to them. It becomes important to dig your ice axe while moving as there is a possibility of slipping and a well dug axe can be the saviour.
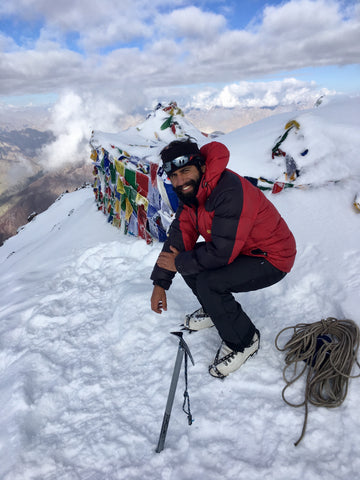
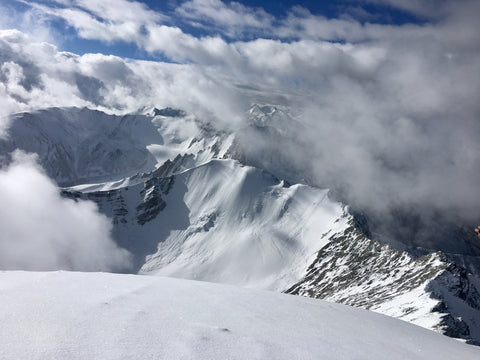
- Finally, the sight of prayer flags at the summit (6,123m) filled me with exuberance (alongside some tears). Those are the only colors that you will spot on this trek and what colors! I had a clear sky by the time I reached summit at 730 AM except the side from where you can spot Leh city but I won’t complain. I took out the carefully tucked in cell phone, got the customary photos and sat for a while to let the view of the snow clad Ladakh range settle inside me
- The walk back is equally tough unlike any other trek I’ve returned from. Settling the crampon on soft snow would occasionally lead to a slip and at one point I let myself slip to eventually ass-slide on the snow while using my ice axe to steer and control speed. This I define as total bliss! I was back at the base camp by 1230PM
- I walked back to Stok on the same afternoon
Hiring a guide: Given that I had to wait for other guides to beat the trail and find a way ahead for most of the trek, I found it impossible to do the trek without a guide. My strategy of following could have failed at any point and I was ready to return back if the situation arrived. The guide charges INR 6,000 per person for the summit night but can be cheaper when hired as a group. Also there is a possibility that you’re unable to find a guide before the night of summit attempt. There are two options otherwise – either you can hire an agency that carries its own ration and tents (INR 14,000 – 18,000 per person) or hire a personal guide from the Mitra Office (INR 2,000 – 3,000 per day) in Main Bazaar, Leh city and then use the Mitra camps on the trek.
My inventory: Waterproof windcheater for upper and lower, Down jacket, Inner thermals for upper and lower, Wicking t-shirt, Fleece jacket, Waterproof gloves, Trekking pants, Semi-waterproof shoes, Extra pairs of socks, Sunglasses for using in snow fields, Sun screen lotion, Warm caps, Head torch, Buff mask
Rented inventory: Snow boots (although any semi waterproof hiking shoes would suffice in summers), Ice axe, Crampons
Total expenditure: INR 5,500
Ideal itinerary: I had to spend one more night at the Base Camp which I think should be the ideal itinerary. Attempting summit on the same night is the regular itinerary advised by many guides and agencies. Having trekked in Nepal at similar altitudes, this surprises me as it seems too fast for reaching 6,000m+. Probably it’s because one doesn’t need to spend much time at this altitude or maybe Stok Kangri is just too welcoming!
I would definitely want to return to Stok in summers next year to see how the trek looks and hopefully I wouldn’t have to wear the treacherous snow boots!